2 Weeks in Patagonia: Best Itinerary for Argentina and Chile (2025)
2 Weeks in Patagonia
Spending two weeks in Patagonia offers the perfect opportunity to explore one of the world’s most breathtaking and remote regions. From the jagged peaks of Torres del Paine to the icy wonders of the Perito Moreno Glacier, this blog will guide you through the highlights of a Patagonian adventure. We’ll cover everything you need to know, from crafting the ideal itinerary and choosing the best accommodations to navigating the region’s diverse landscapes. Whether you’re into epic hikes, insightful tours, or simply basking in the natural beauty, this guide will help you make the most of your two-week journey in Patagonia.
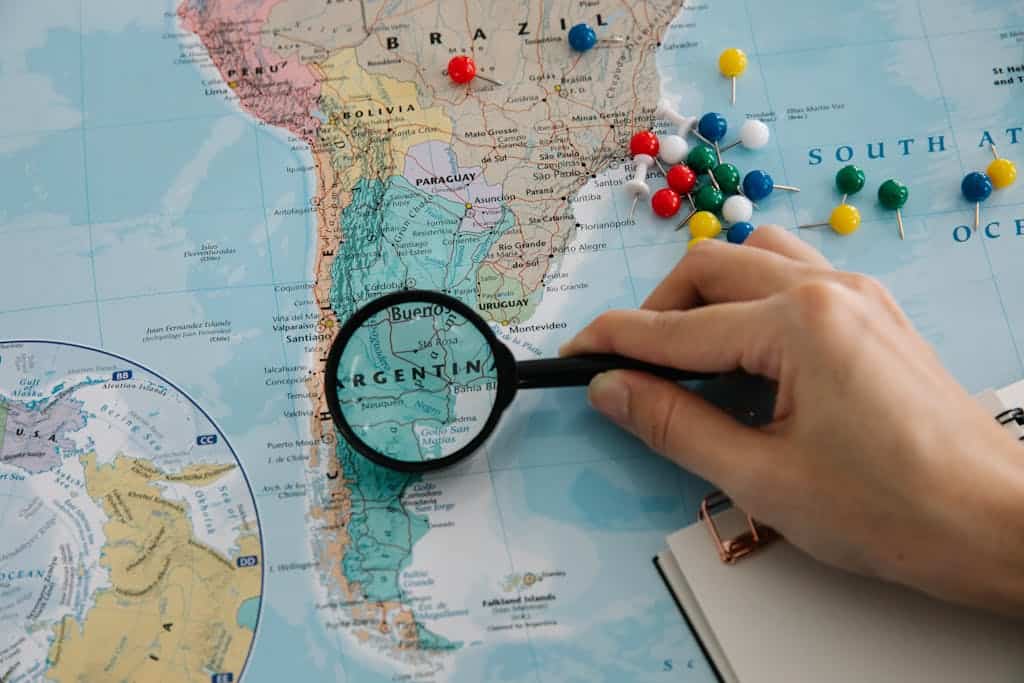
Map of Patagonia: Where Is Patagonia?
Where is Patagonia? Is Patagonia a country? Wait, Patagonia is a region? I’m sure these are all questions we’ve heard or answered for someone at a point in time.
To familiarize ourselves on the vast region of Patagonia, here are the basics in a nutshell:
- Patagonia spans across the southern regions of two South American counties: Chile and Argentina
- The total land mass of Patagonia is over 260,000 square miles (673,000 km²) and population density is 1-2 people per km² making it one of the least populated regions in the world
- Patagonia is most know for it’s spectacular mountainous terrains of the Andes, glaciers and vast desert region (no, not like sand dunes and riding camels, instead picture endless miles of treeless, flat and gently rolling land covered in grasses and small amounts of vegetation. It’s a sight to see!)
*Please note that Sights and Summits Travel contains affiliate links. If you make a purchase using one of the links, I may earn a small commission – at no additional cost to you. As always, all ideas and opinions expressed in this post are my own. Thank you for your support!
Overview: Itinerary for 2 Weeks in Patagonia: Chile and Argentina
We all the know the saying “So much to see, so little time” and let me tell you, Patagonia may be where this saying originated. Below is my handcrafted itinerary for the best 2 weeks in Patagonia exploring both the Chilean and Argentinian regions. This itinerary has a heavier focus on Torres Del Paine National Park, El Chaltén and El Calafate.
While there are so many other stunning regions to explore in Patagonia, travelling between these areas can take up A LOT of time which is why i’ve built the best 2 weeks itinerary for Patagonia to maximize on time and experience summiting mountains, exploring glaciers and basking in the beauty of mother nature.
Day | Activity | Lodging Location |
1 | Fly into Puerto Natales | Puerto Natales |
2 | Day to Explore Puerto Natales | Puerto Natales |
3 | Day 1 of The W Trek | Torres Del Paine NP |
4 | Day 2 of The W Trek | Torres Del Paine NP |
5 | Day 3 of The W Trek | Torres Del Paine NP |
6 | Day 4 of The W Trek | Torres Del Paine NP |
7 | Day 5 of The W Trek | Puerto Natales |
8 | Travel to El Chalten | El Chalten |
9 | Hike Laguna del Los Tres | El Chalten |
10 | Rest day: Explore El Chalten | El Chalten |
11 | Hike Loma del Pliegue Tumbado | El Chalten |
12 | Travel to El Calafate | El Calafate |
13 | Perito Moreno Glacier | El Calafate |
14 | Fly to Santiago | Santiago |
Now that you’ve seen a glimpse of your next amazing adventure, keep reading for recommendations on how to spend each day and key tips for a seamless travel experience!
When to Visit Patagonia?
If you only have 2 weeks in Patagonia, you need to maximize on your time hiking with the best weather! Remembering Patagonia is in the Southern Hemisphere, Spring and Summer run from November until February. Anytime between these months will increase your chances of having the mild weather and longer days!
Itinerary for 2 Weeks in Patagonia: Chile and Argentina
Get ready for the ultimate 2 Weeks in Patagonia, this itinerary is designed for the outdoor enthusiast whose motto is “ain’t no mountain high enough”. Don’t fret, while this 2 week Patagonia itinerary will take you up mountains (that somehow get more impressive each day), there are some rest days to explore the beautiful mountain towns, go for a swim or shift the hike days for the optimal weather window.
Day 1-2: Puerto Natales, Chile
Welcome to the start of your 2 weeks adventure in Patagonia! Puerto Natales is the gateway to one of the iconic regions on the Chilean side of Patagonia – Torres Del Paine National Park.
Puerto Natales is a great mountain town to stretch your legs, grocery shop for your trekking through Torres Del Paine National Park and sample some of the local cuisine (Guanaco pizza anyone?).
Recommendations
🛏️: Last Hope is a budget friendly hostel locations roughly 15 minute walk from the bus terminal and 5 minutes to the main square. Rooms were clean, there was a nice social area and the staff were very friendly and helpful!
🍕: Mesita Grande was an excellent woodfire pizza place. I had the Guanaco Pizza, the meat was so tender and the flavours were incredible. They also had a selection of tasty looking pasta and weekly specials. I also recommend ordering a traditional Pisco Sour!
🍨: Aluen this is a fantastic gelato spot! They have over 20 flavours to try, I got the Maracuya and Mandarin and will be dreaming about this cup of gelato until I return to Chile.
Day 1: Travel to Puerto Natales
Welcome to Chile! On day one of your epic 2 weeks Patagonia adventure, you’ll make your way from the airport into the town of Puerto Natales. The airport is a short drive, only about a 10 minutes (9km) from town.
I get anxious leaving airports and have heard too many horror stories from fellow travellers unfortunately choosing the wrong cab driver. I try to avoid that situation and calm my nerves by booking an airport transportation/shuttle service ahead of time (starting at approx. $5USD) or speaking with an individual at a licensed taxi booth inside the airport. It can be a little more expensive, but it’s worth my peace of mind.
Chances are you’ve travelled a long way to arrive here, use today as a rest day to get over the jet lag, stretch your legs with a nice walk around the town and enjoy a nice meal. If they weather is nice and you’re feeling up for it, take a stroll down to Puerto Natales Waterfront to watch the sunset.
✈️ Travel Tip: When selecting your seat – choose a window seat on the left side of the plane to see incredible view of Torres Del Paine National Park!
Day 2: Explore Puerto Natales
Today is a leisure day of exploration around this quaint town. I personally spent the day visiting local cafes, eating endless empanadas and hunting down the best Gelato. *Spoiler Alert* it’s at Aluen, their Maracuya and Mandarin were so fresh and flavourful!
This is also a great day to grocery shop for your food supplies for The W Trek, there are several grocery stores with great selections. While their selections are great, it’s nearly impossible to find dehydrated meals you are familiar with in North America. If you preferred dehydrated meals, I would suggest you pack them in your checked bag.
If you’re looking for a little more adventure on this day, there are a few local Estancia’s where you can go horseback riding with a gaucho through the diverse landscapes. These excursions normally include light refreshments and a meal. It’s a great way to see more of the landscapes from a local.
Day 3-7: Torres Del Paine National Park
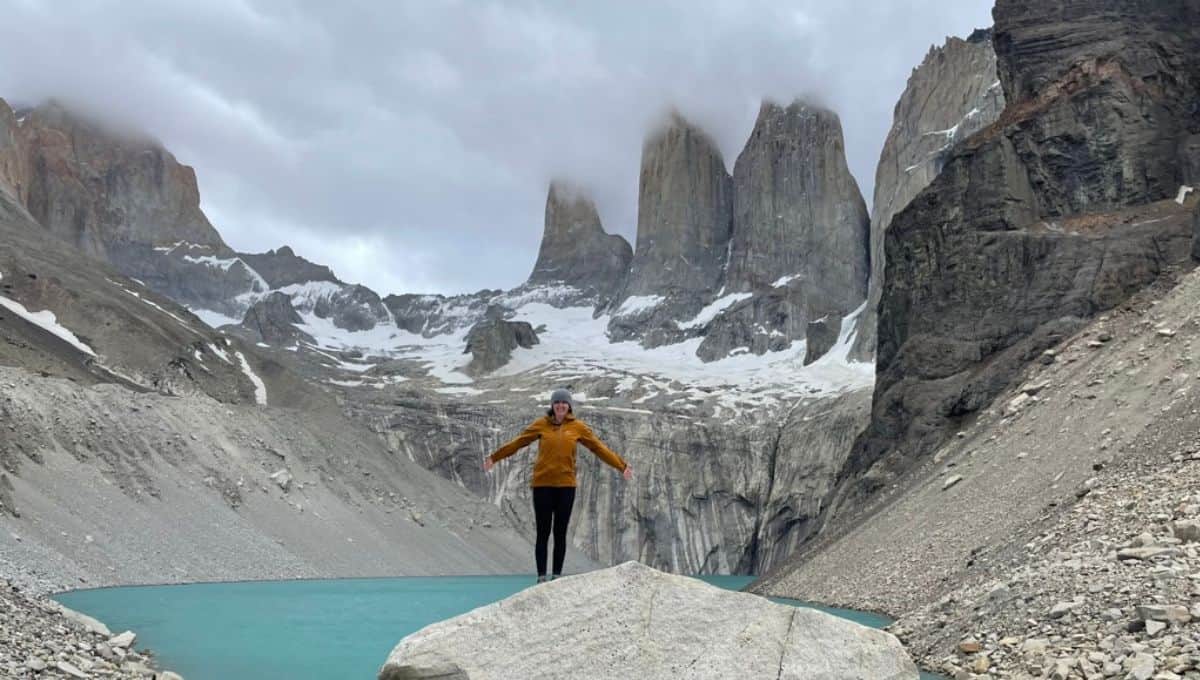
Day 3: Torres Del Paine National Park – Mirador Base Torres
Torres Del Paine National Park here you come! I’d recommend starting the day off early by catching the earliest bus from Puerto Natales to Torres Del Paine National Park.
I caught the 6:45am bus from Puerto Natales which arrived into Torres Del Paine National Park about 2 hours later at 8:50am. When you get into Torres Del Paine, you’ll have to get off the bus and show your National Park ticket and The W Trek booking information to the park attendants. Make sure to take screenshots of your information, service is spotty and WiFi is expensive.
Once you’ve been cleared, you’ll walk down a short path and hop on Torres Del Paine National Park shuttle bus that will take you to Central. You will have to pay cash in Chilean peso, they did not accept USD. The cost of a one way ride is approximately $6USD.
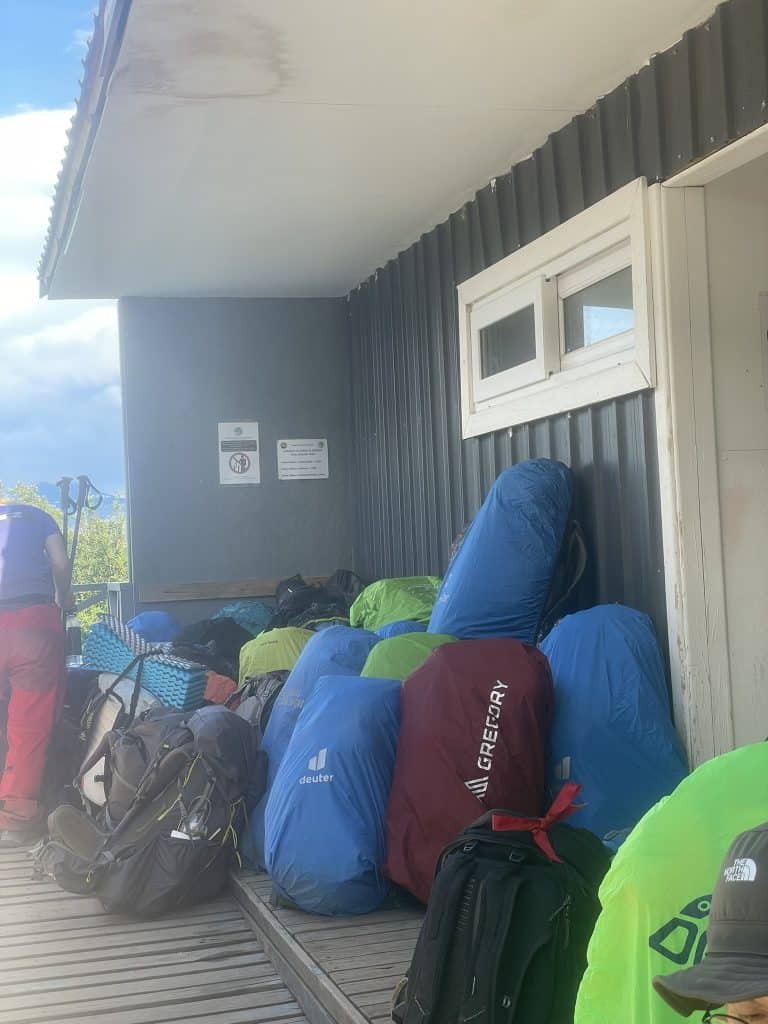
Once you arrive at Central it’s time to start to the base of Los Torres! If you’ve chose Central as your first night stay, leave your heavy pack at the Refugio and only take what you need for the hike.
When I was reading blogs, this was recommend by several people, however, being “an experienced backcountry camper” I thought I would be fine, what’s a couple extra pounds right? Well …wrong. Did I finish the hike? Yes. Was I needing to take a thousand more breaks, contemplating why I thought this was a good idea and considering eating all 5 days of food in one sitting? Also, yes.
This hike is truly stunning, you’ll walk through meadows, cross several bridges, mini streams, hike along steep edges of mountains, share the pathway with horses, brave sandstorms and one very steep ascend to reach the base towers.
Be sure to bring warm layers with you and great wind/rain jacket. There are some very windy sections on this trail (stay away for the edge, many times the wind was catching our backpacks and spinning us around). Also, the summit can get very cold, you’ll want to bundle up to really enjoy the efforts of your hard work.

🏔️About the hike:
Central to Central: 22km
Time: plan for 4h 15m each way (Total 8h and 30m)
Elevation: over 830m of elevation gain
Day 4: Torres Del Paine National Park – Central to Frances
Day 2 of The W Trek! Hopefully you had a good sleep and your body wasn’t in too much pain, today you’ll have an “easier” day. I say easier because the elevation is about half of yesterday’s and you’ll be hiking 5km less.
Feel free to take your time getting up today, it should take you approximately 5 hours and 30m to hike the 17km.
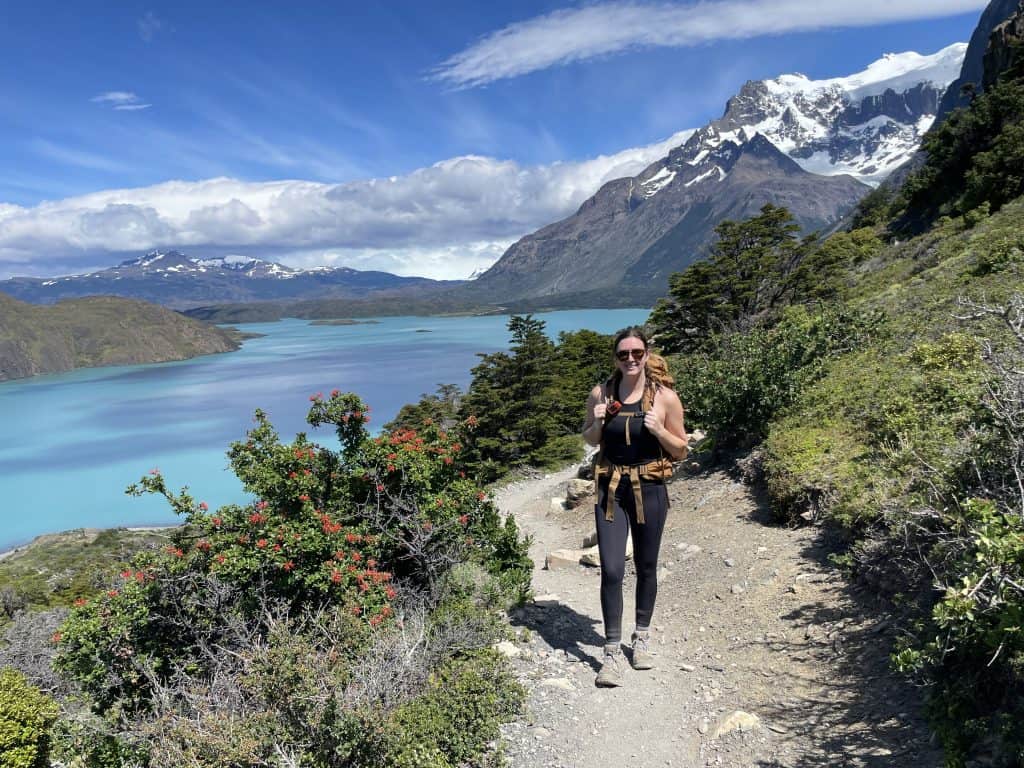
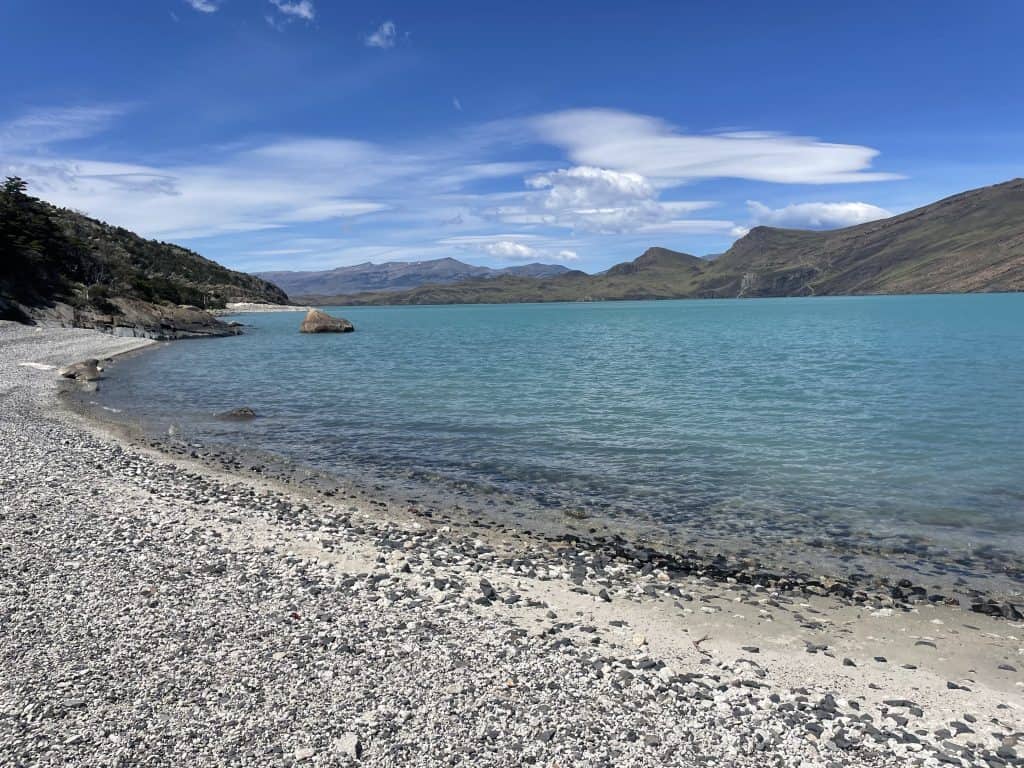
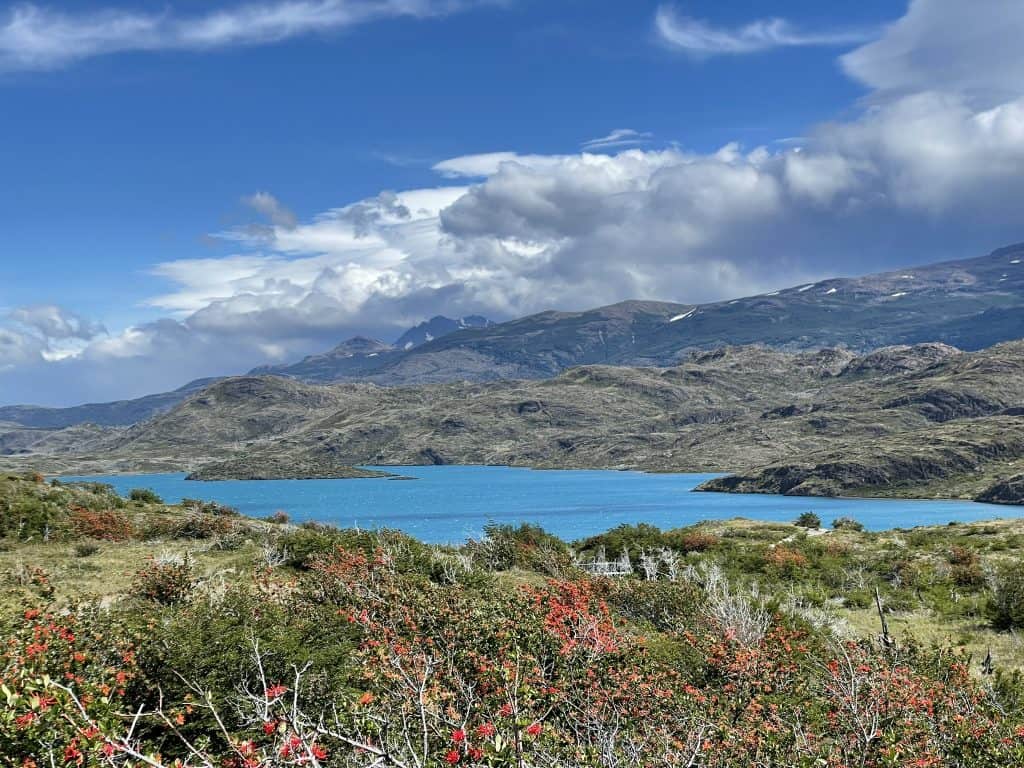
Today you’ll see beautiful snow capped mountains, peaks of glaciers, gorgeous mossy meadows and the most spectacular turquoise water at Lake Nordenskjöld. Anywhere along this lake is a great spot to stop for a snack and watch how the cloud coverage creates darker blue shadows on the water.
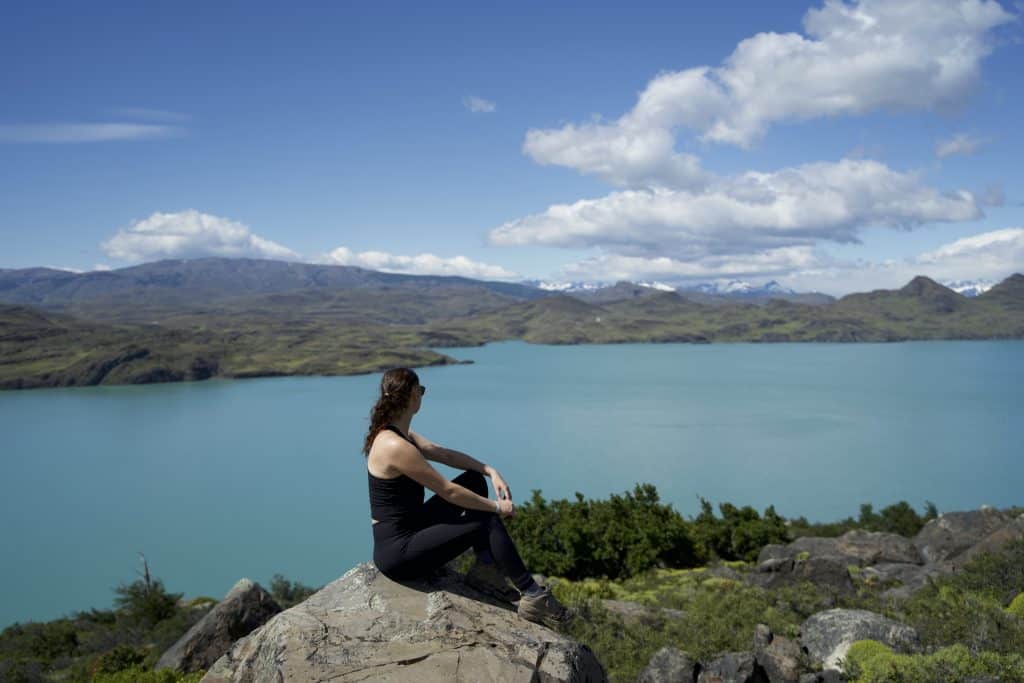
If you’re needing to refill your water, you can stop at Cuernos and use their filtered tap. If you’re lucky, you might even be able to get a game of foosball in!
Once you pass Cuernos, you’ll continue hiking along Lake Nordenskjöld and will be brought down to the beach. If you’re feeling brave, consider taking a nice refreshing cold dip in the water. If not, it’s also a great spot to lay in the sun, have a snack or skip some rocks.
A few kilometers later you’ll reach you humble abode for the night, Frances. Be sure to pay attention to the signage. If you are camping you’ll continue walking up, if you staying in the Refugio, you have about 600m of downhill which will feel great. Just remember, what goes down must come up.
Day 5 – Torres Del Paine National Park – Frances to Paine Grande
You’re almost halfway through The W Trek! Today you have another big day ahead of you, you’ll be hiking over 20km and 570m of elevation gain to get to the highest point of The W Trek – Mirador Britanico at over 1200m.
You’ll wake up and have a short 20 minute hike before you reach the Italiano campground where you will leave your packs and bring only what you need for the day hike.
As I mentioned earlier, don’t be a hero. I was smarter this time and ended up sharing a backpack with my hiking partner, I would highly recommend doing this if it makes sense for you.
*Pro Tip* The first section of this hike is the steepest, once you reach Mirador Frances, the hike feels more like a stroll through the woods until you reach Mirador Britanico.
A lot of people recommend if you’re tired to stop at Mirador Frances and turn around. As being someone who wanted to say I FULLY completed The W Trek, this wasn’t an option for me. I pushed on the extra 1 hour to make it to Mirador Britanico.
However, after having reached Mirador Britanico, we had a quick snack and then turned back around to head towards Mirador Frances to enjoy our lunch. While there were beautiful 360 degree views of the mountains from Britanico, I enjoyed watching bits of the glacier fall off at Mirador Frances more.

Once you’ve come down from Mirador Frances, you’ll pick up for bags and continue your hike until you reach Paine Grande. This part of the trail holds so much beauty it’s almost impossible to put into words.
You’ll spend the larger part of the day hiking alongside the gorgeous Lago Skottsberg, through dead forests (remember campfires are not allowed) and meadows until you reach the end of Lake Pehoe where Paine Grande is situated and you’ll set up camp for the night.

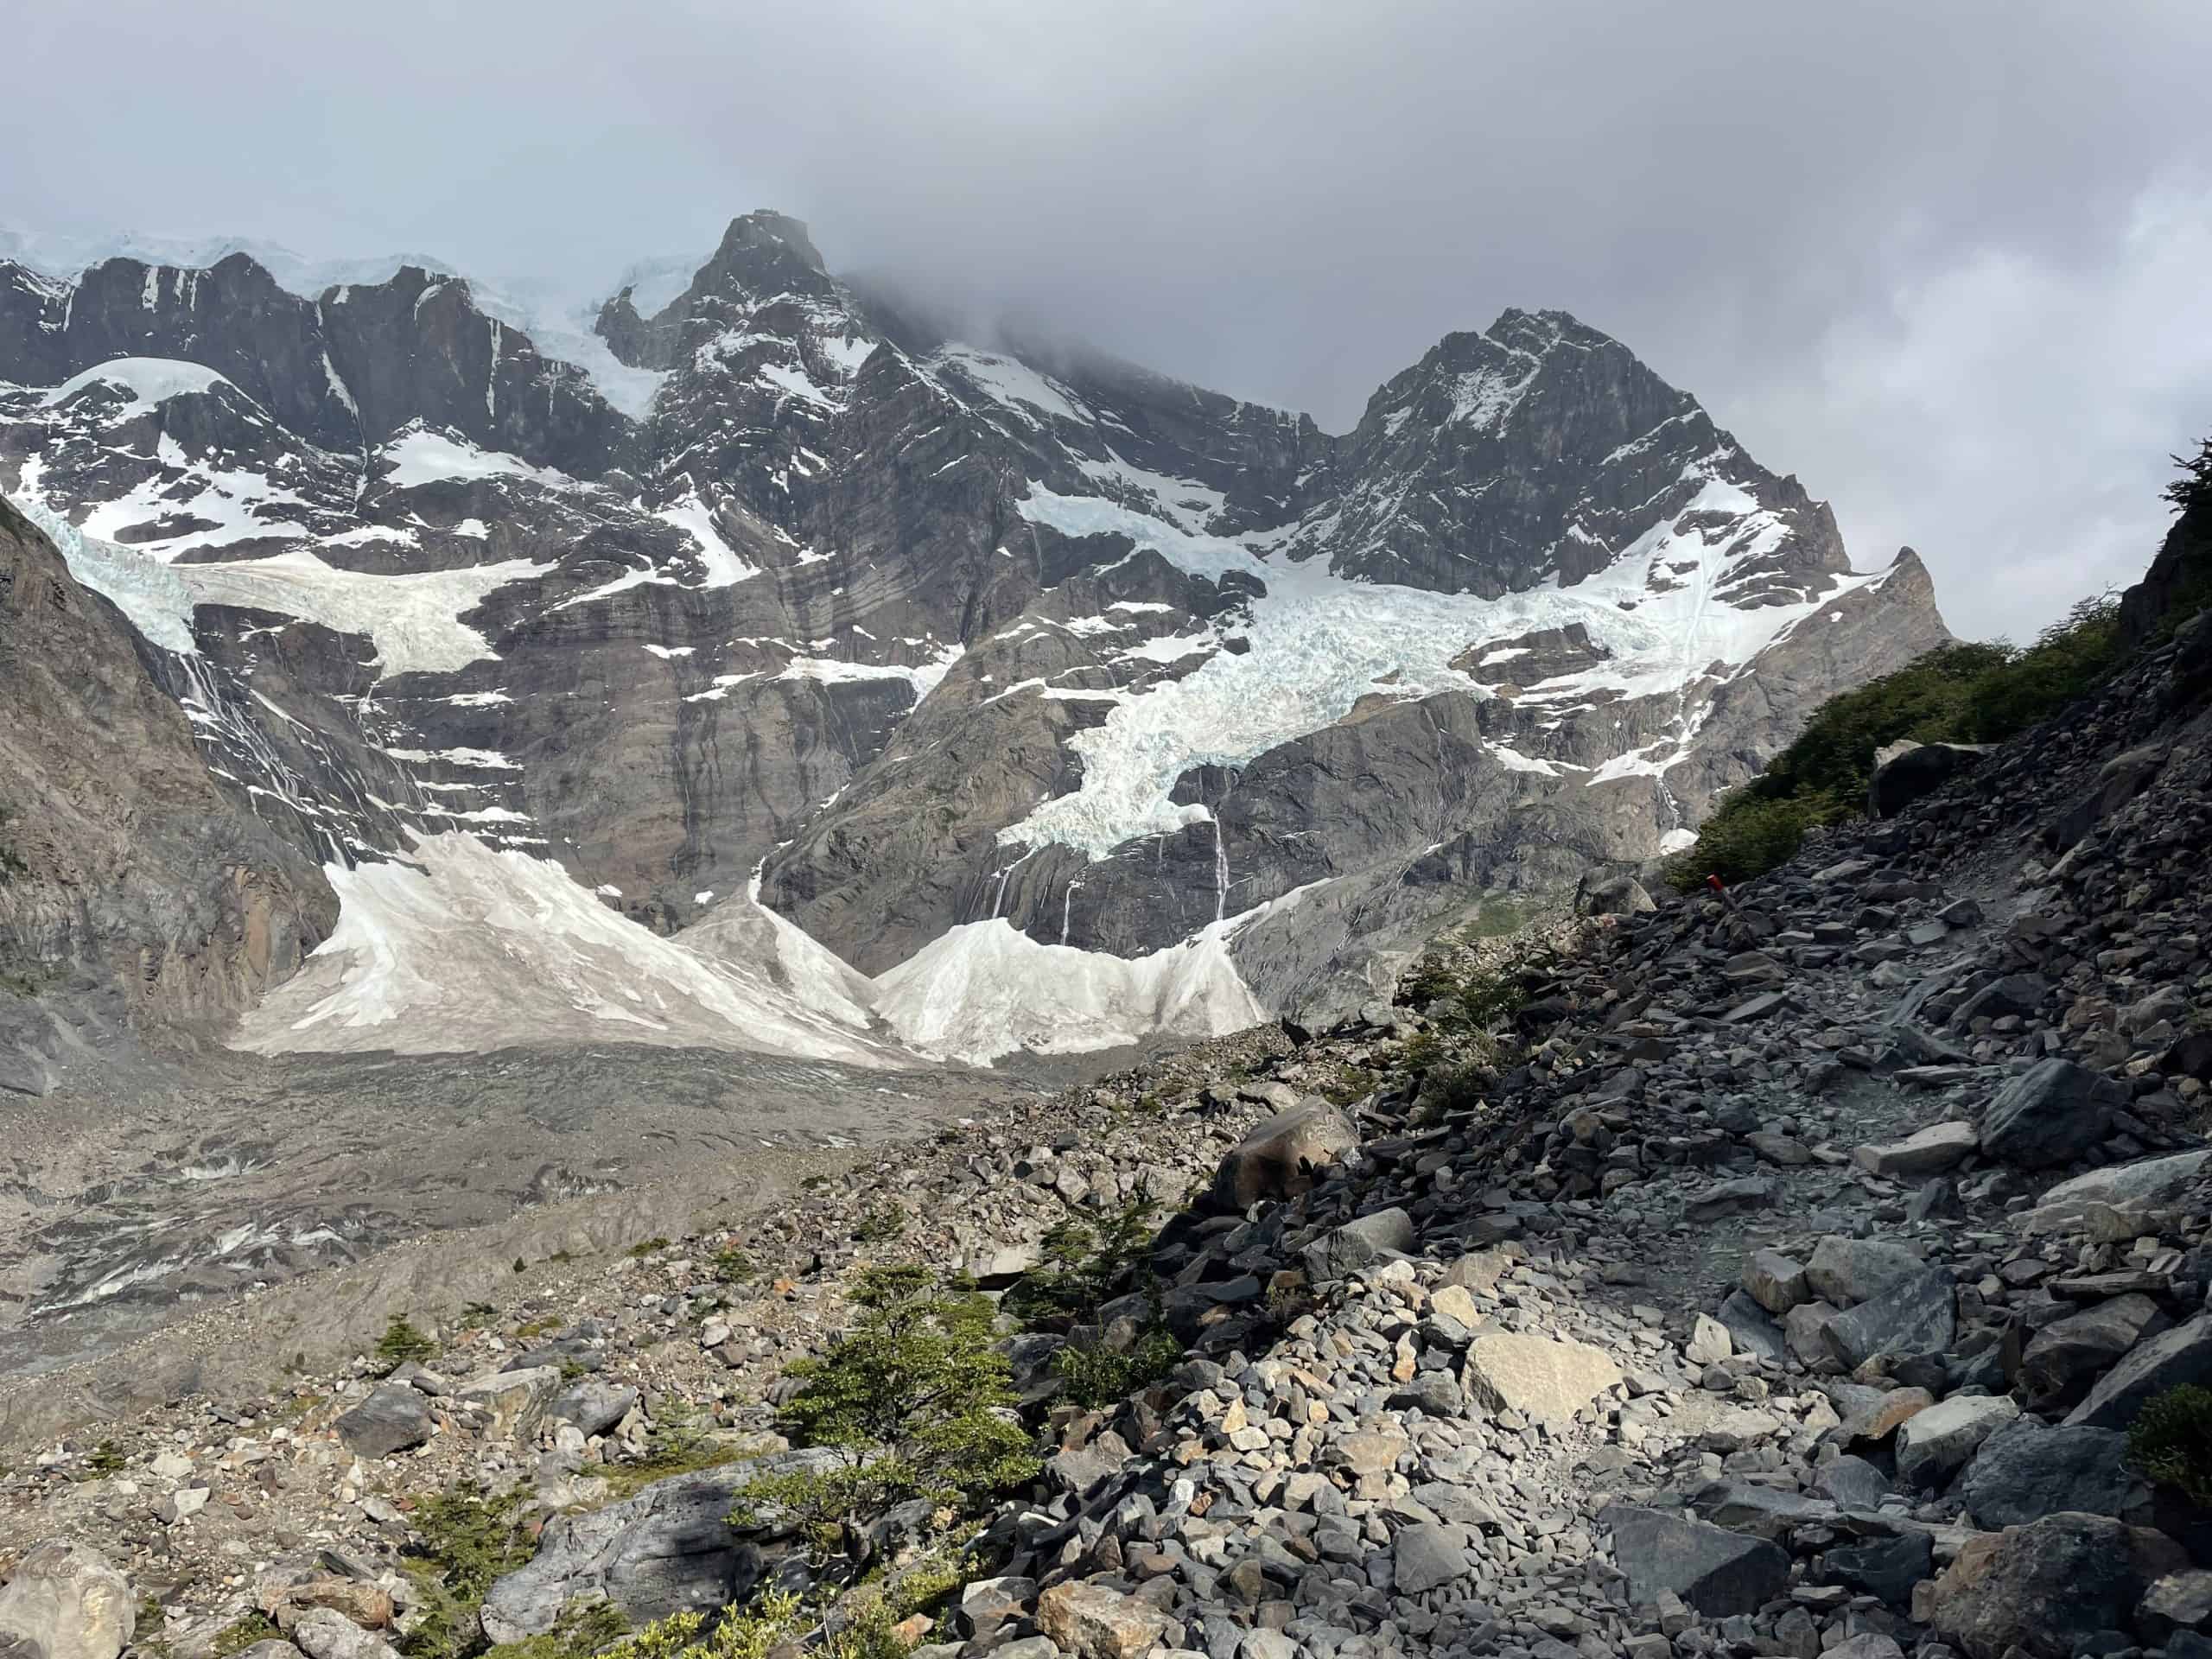
Day 6: Torres Del Paine National Park – Paine Grande to Grey Glacier
You’re almost there, can you hear the tune of “it’s the final countdown” playing? Today will feel like a real treat, you can have a lazy morning as you only have a 10km hike to Grey Glacier. This is a beautiful little hike with more stunning lake views and today you’ll see your first iceberg from pieces that have broken of from Grey Glacier.
Be cautious when you are hiking this trail if it’s raining, there are certain sections where you are descending mini waterfalls and steep cliff faces. Take your time and don’t rush.
When you arrive at Grey Glacier, this would be a great spot to drop off you backpack, have lunch and check-in at 1pm.
After you’ve checked in, pack up a small day pack and head up to the “Second Suspension Bridge” for an unreal lookout of Grey Glacier. Now, this is going to seem like a fairly steep climb because it’s mostly all uphill about 250m of elevation gain in about 1km, but it’s 100% worth it.
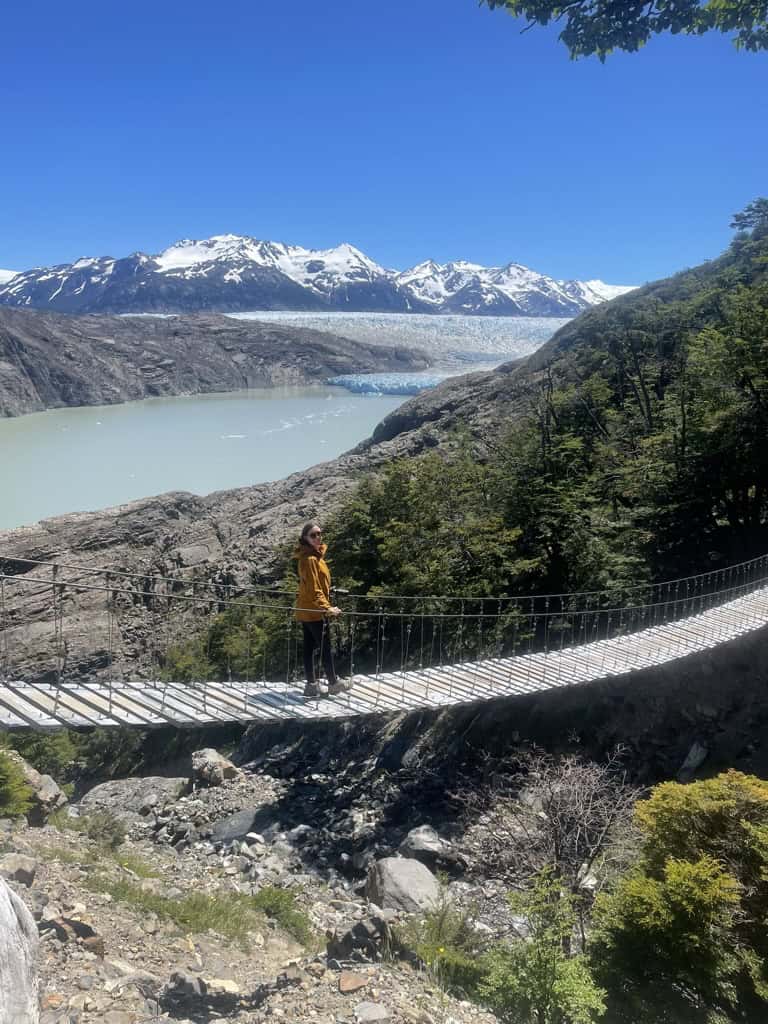
As the title implies, you will need to pass two suspension bridges. When you pass the second suspension bridge, hike another 5 minutes along the ridgeline until you reach the viewpoint, you can’t miss it.
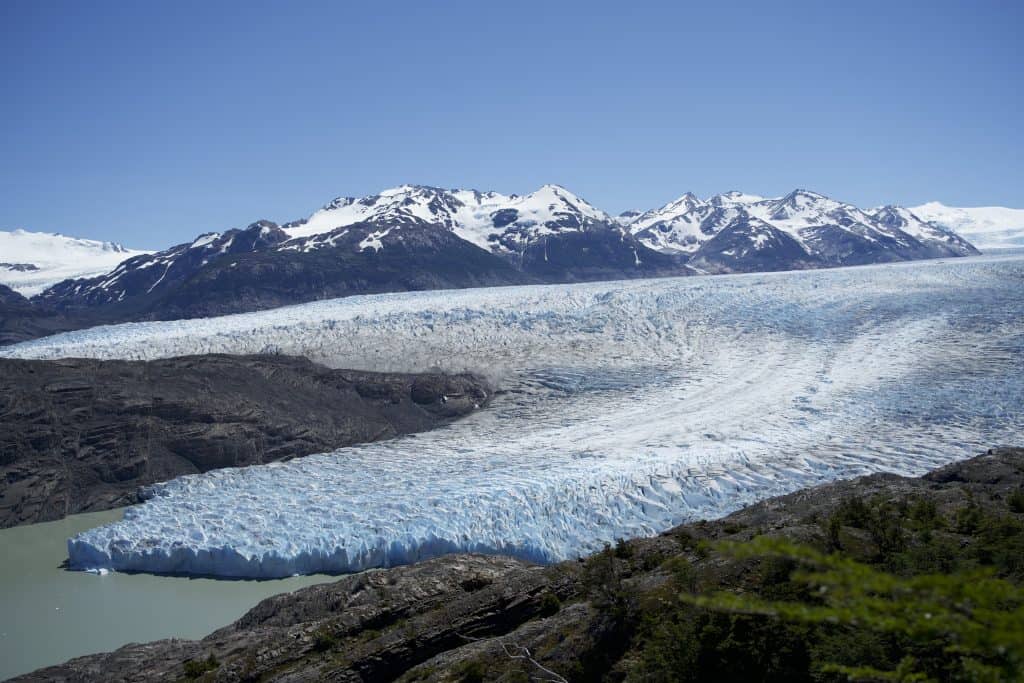
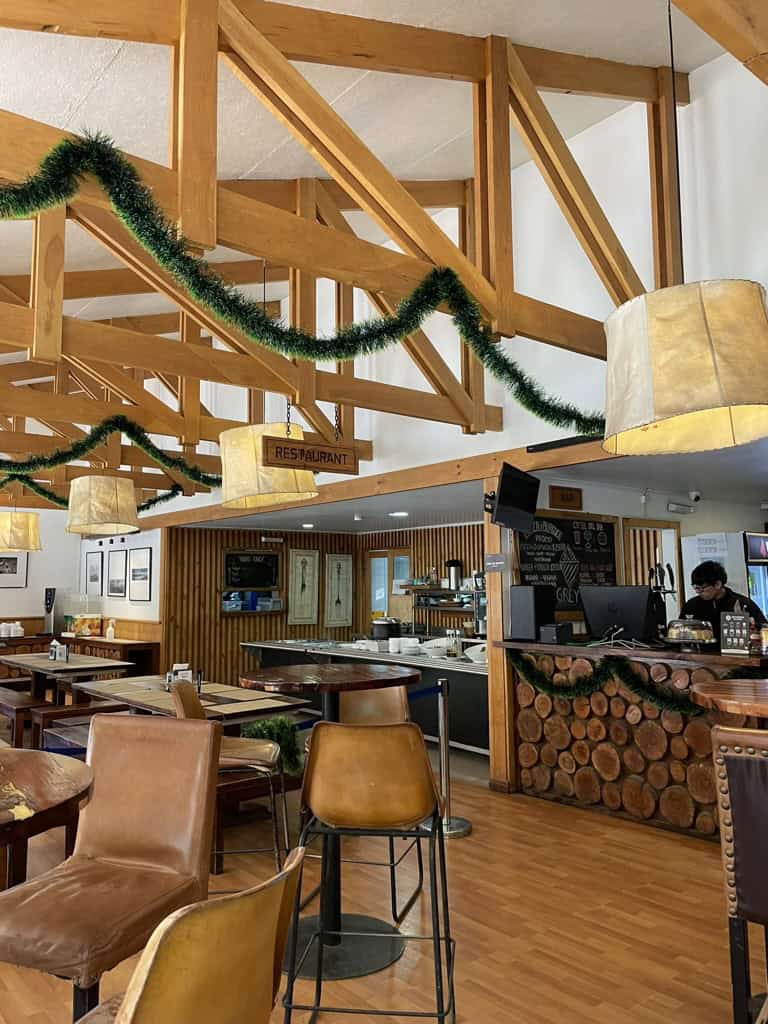
When you’ve had your fill of spectacular glacier views, make you way back down to Grey Glacier. The Refugio here was really nice, they had a nice cafe, bar and even served some tasty looking pizzas.
Now, if you’re looking for some more adventure and wanting to cross walk on a glacier off your bucket list. I would recommend signing up for Glacier Trekking for the next day. Note – you will need to book this in advance as spots do fill up. I was one of the unlucky ones and wasn’t able to go but heard amazing stories from multiple people.
You can always save Glacier Trekking for El Calafate, however, the price of the glacier trekking is less than half of what you’ll pay in Calafate and you’ll have more time hiking on the glacier. I couldn’t think of a better way to reward yourself for hitting the half way mark of your 2 weeks in Patagonia!
🗓️Travel Tip: If you’re wanting to save a day in your 2 weeks in Patagonia Itinerary, you can hike to Grey Glacier and come back to Paine Grande in 1 day. I recommend staying the night at Grey Glacier only if you’re wanting to see the view from the second suspension bridge or go Glacier Trekking the next day.
Day 7: Grey Glacier to Puerto Natales
I know it’s hard to believe, but you are officially halfway through your 2 weeks in Patagonia trip and on the official last day in Torres Del Paine National Park.
Today you’ll make the 10km hike back to Paine Grande, this took us roughly 3 hours and we were moving pretty quickly as we were on a mission to catch the 11am ferry. If you want extra time to explore Torres Del Paine National Park, I would recommend taking the earlier ferry.
The ferry ride is truly so beautiful, you are rewarded with a different view of Torres Del Paine from the lake with, lush green hills, vibrant blue waters and dreamy mountain scapes. It’s an outdoorsy persons paradise!
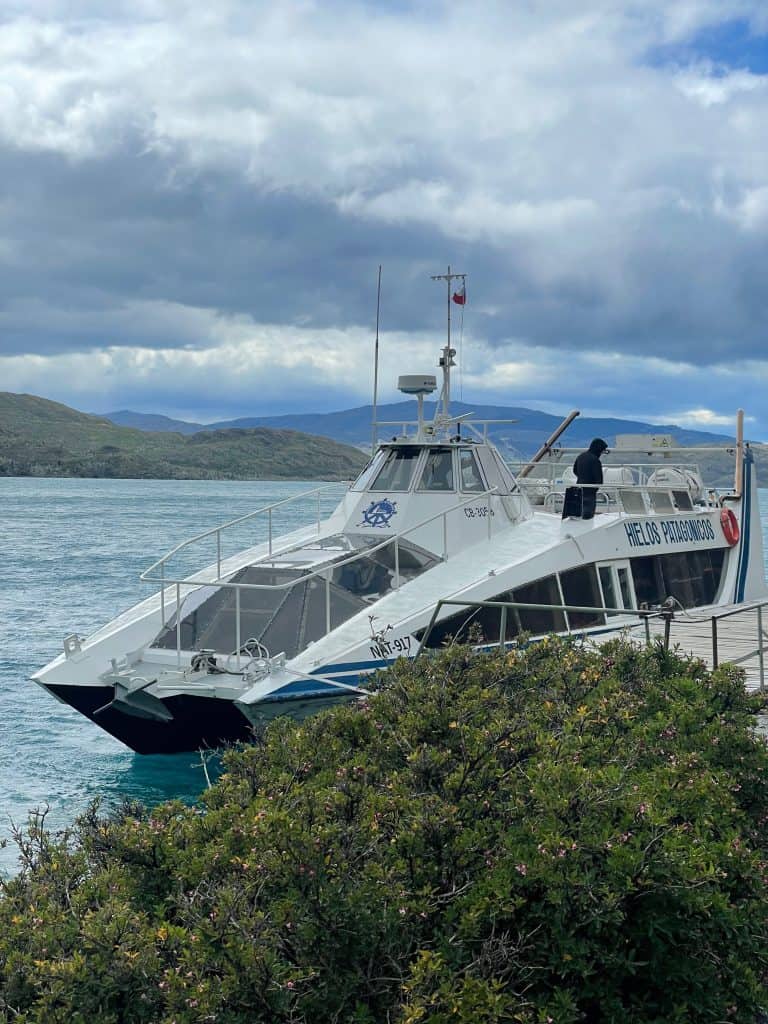
Note – you have to book your ferry ticket in advance online. You can pay in cash, at the time of boarding but you risk not being able to make it as people with tickets have priority.
My original plan was to spend the afternoon exploring Lake Pehoe and hiking Mirador Condor, however, mother nature surprised us with winds up to 50km/h that were chucking stones and dirt in our faces which made it impossible to walk the 5km, so we cut our losses, hopped on a bus and made our way back to Puerto Natales.
🚌Travel Tip – You will need to purchase a bus ticket out of Torres Del Paine National Park in advance. Be sure to do this before you enter the park, or you can purchase WiFi to get your ticket. You might get lucky and be able to pay a bus driver in chilean pesos if the bus is not full, but do not count on this as a reliable option.
Day 8-11: El Chalten
Day 8: Travel to El Chalten
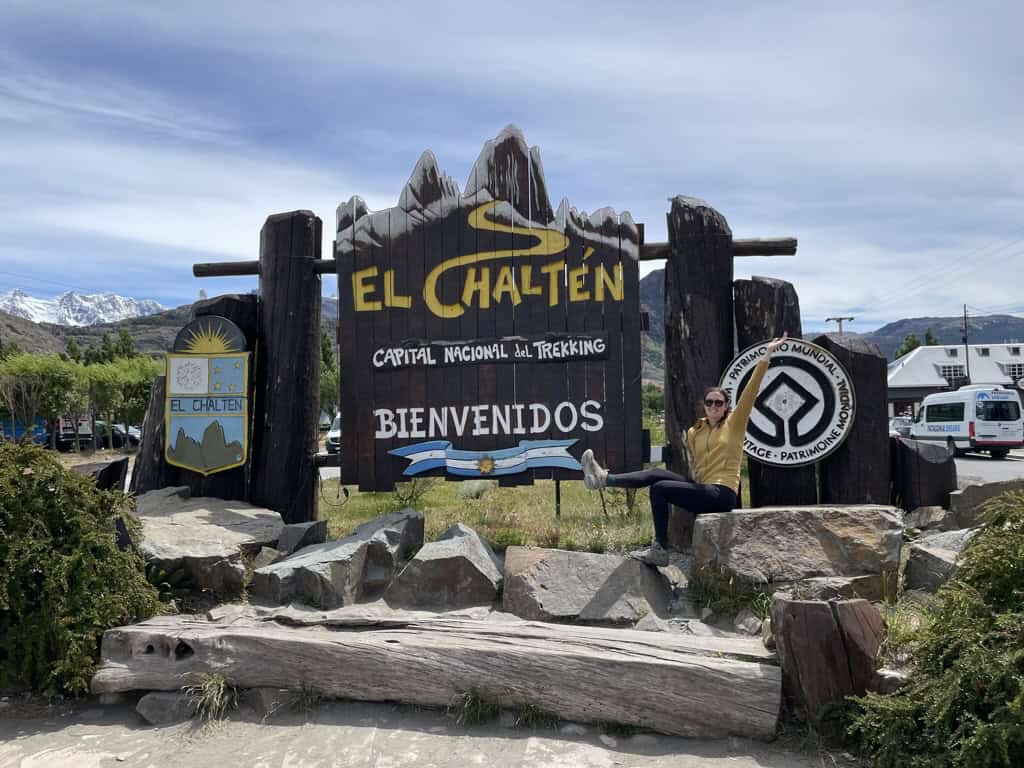
It’ll be hard to believe you’re already halfway through your 2 Weeks in Patagonia, it’s time to say “Adios or Hasta Luego” to the Chilean side and say “Hola” to Argentina!
You’ll start your day by taking the bus from Puerto Natales to El Chalten. There is no direct bus route from Puerto Natales to El Chalten so you will have to transfer in El Calafate. I would recommend leaving at least 1 hour transfer time in case your bus is delayed by weather or boarder crossing.
This bus ride is quite long to El Calafate as you have to cross the border and clear customs. Although the distance might seem long at first glance, the scenery is truly so beautiful you’ll feel like you’re on the set of the next Planet Earth.
In my personal opinion the buses were quite comfortable. The seats were in great shape, had free WiFi, charging ports and on some buses even had foldout leg rests. Make sure you bring your favourite snacks and something to drink for a comfy ride.
The bus also made frequent stops for coffee, lunch and bathroom breaks so if you forgot something or are getting hangry don’t fret!
Expected Travel Times
Puerto Natales -> El Calafate: 6h 15m
El Calafate -> El Chalten: 2h 40m
Total Time: Approx. 9h
*I recommend taking the earlier bus around 7am from Puerto Natales this way you will arrive in El Chalten before dark. This also give you some options to take the 6pm bus from El Calafate if you miss your connection.
Once you arrive in El Chalten I recommend checking into your accommodation and stretching your legs by going for a walk through this picturesque mountain town to get a bite to eat or a pint.
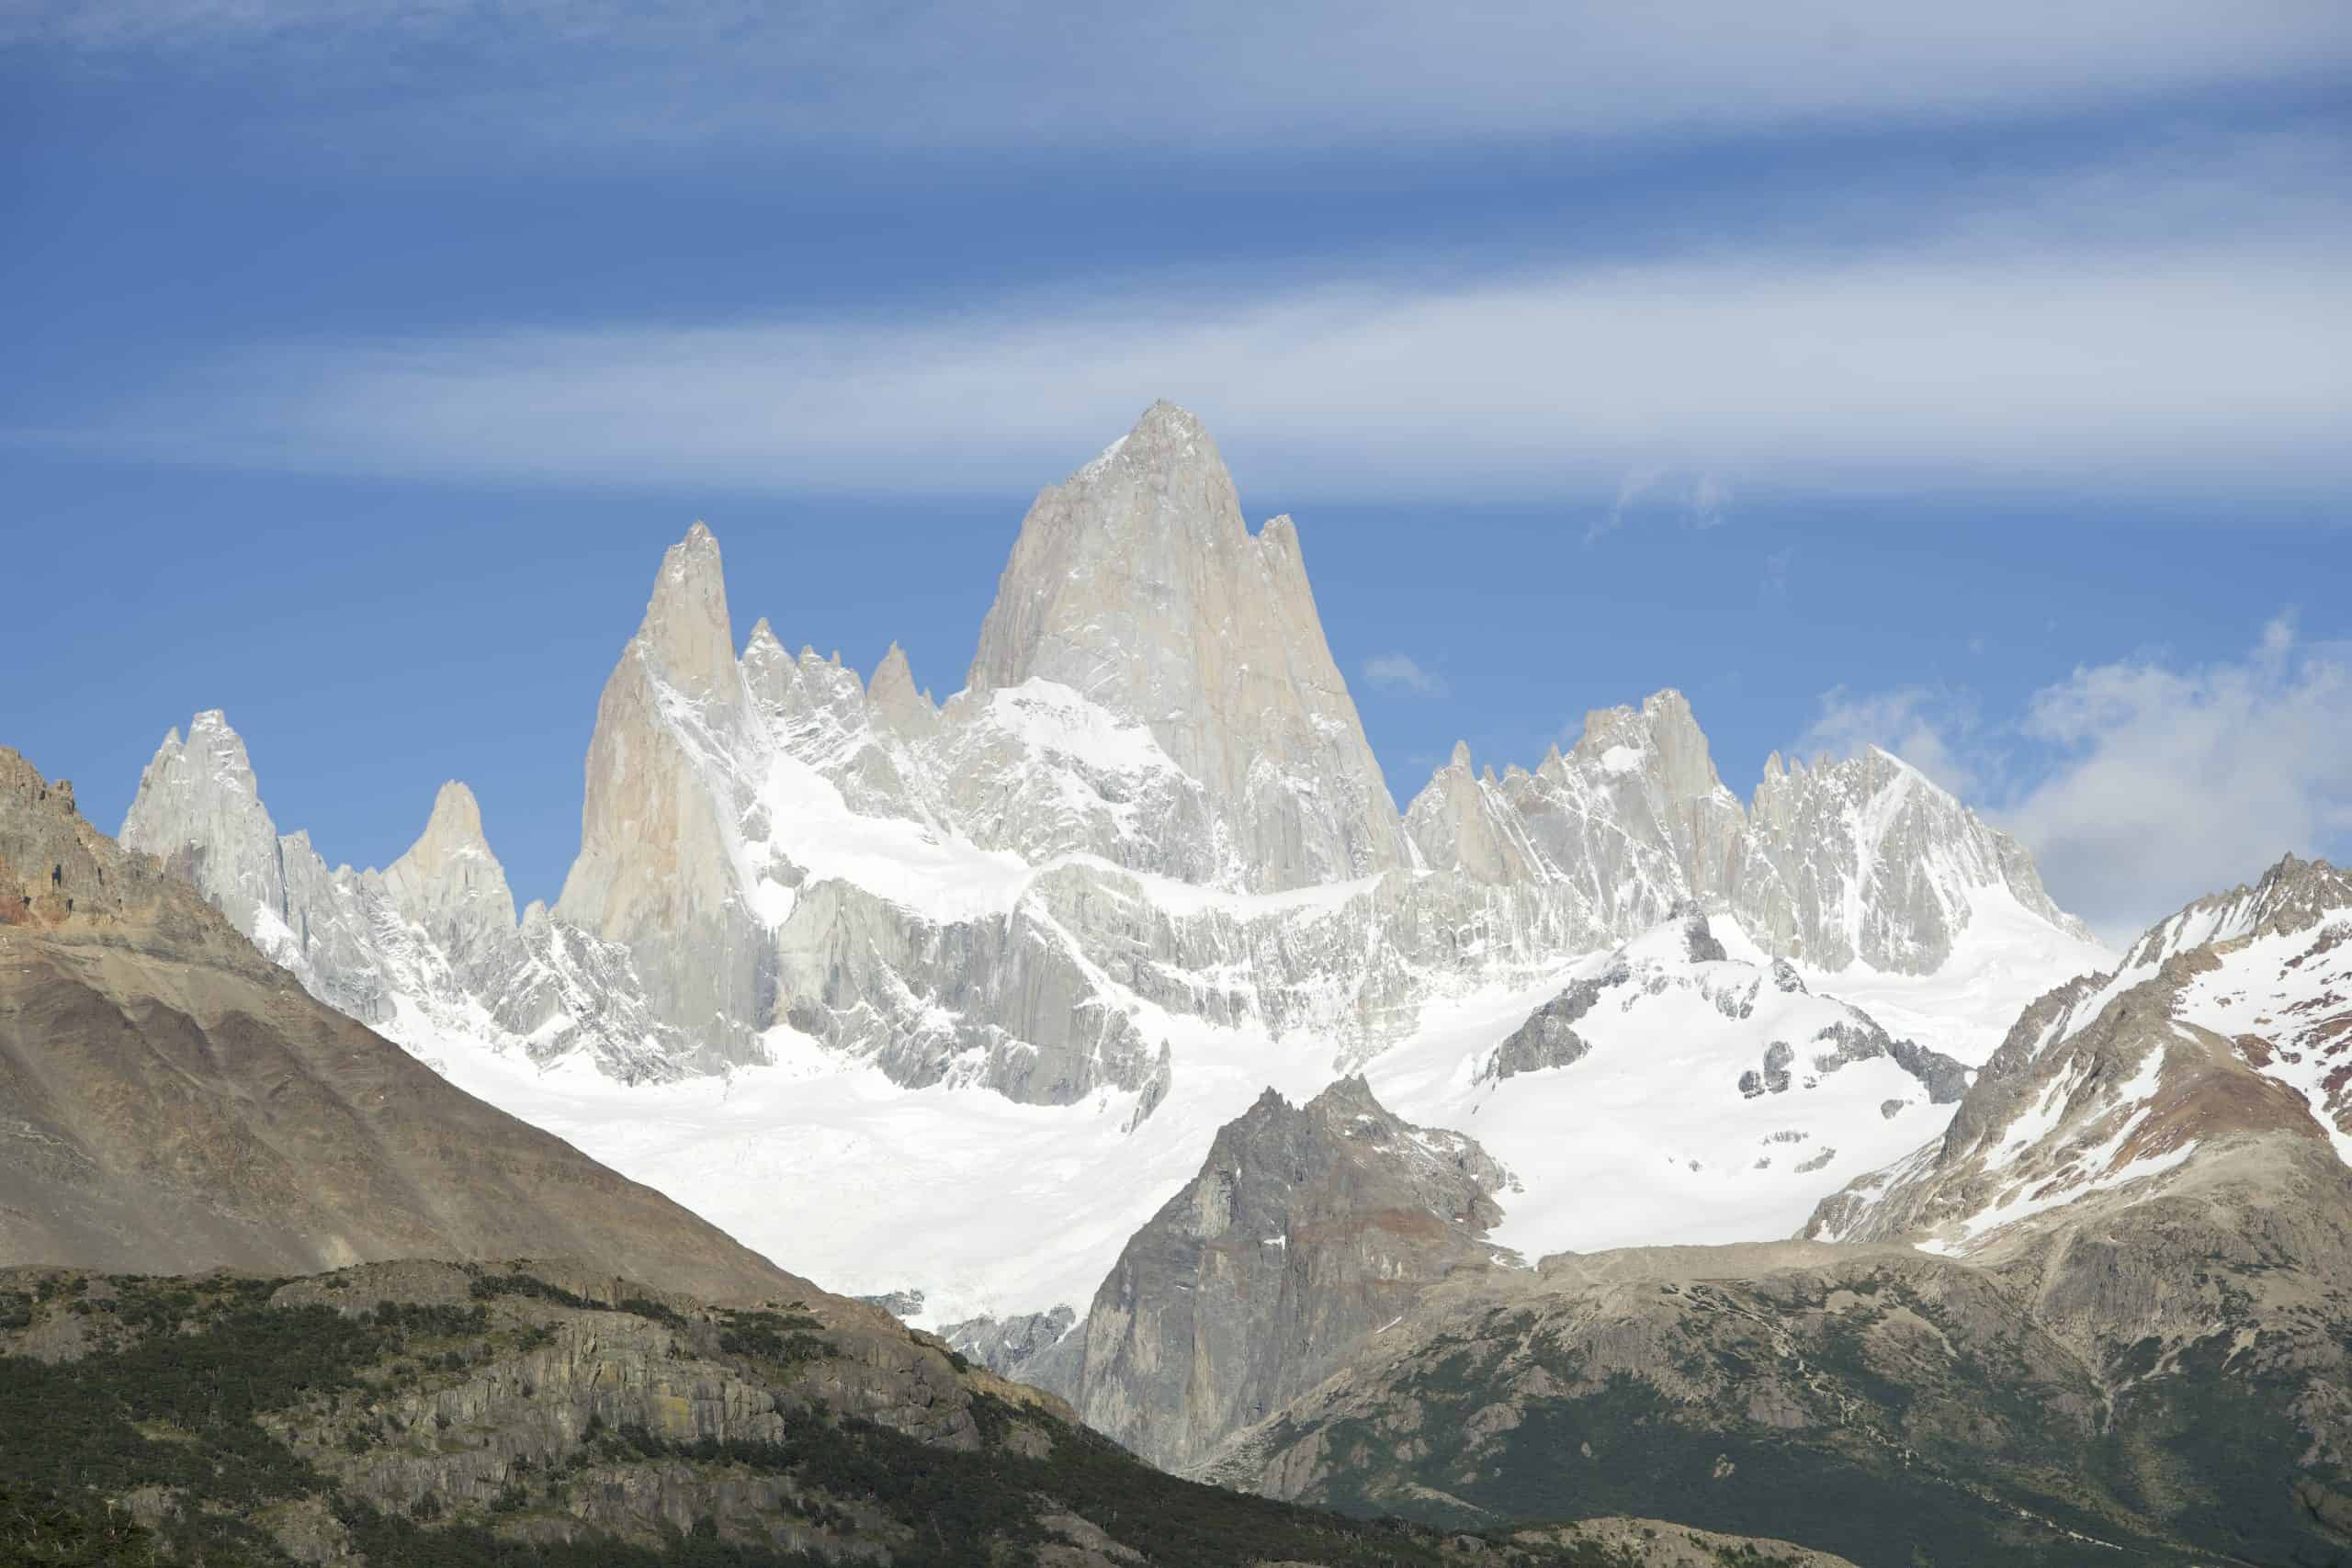
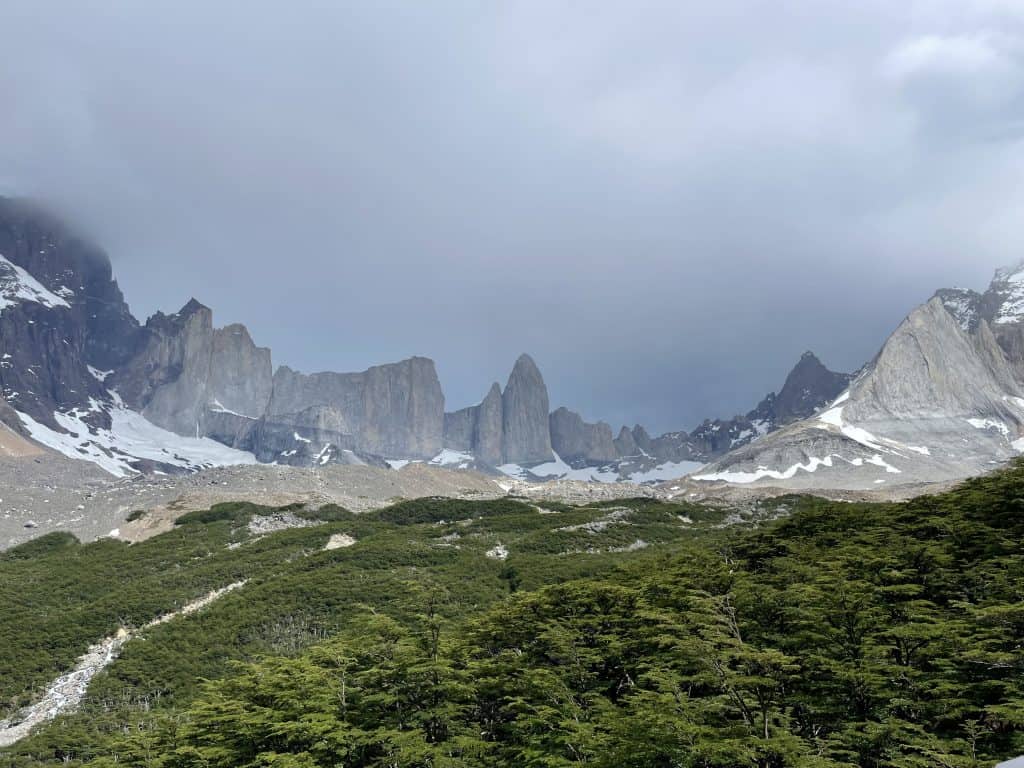
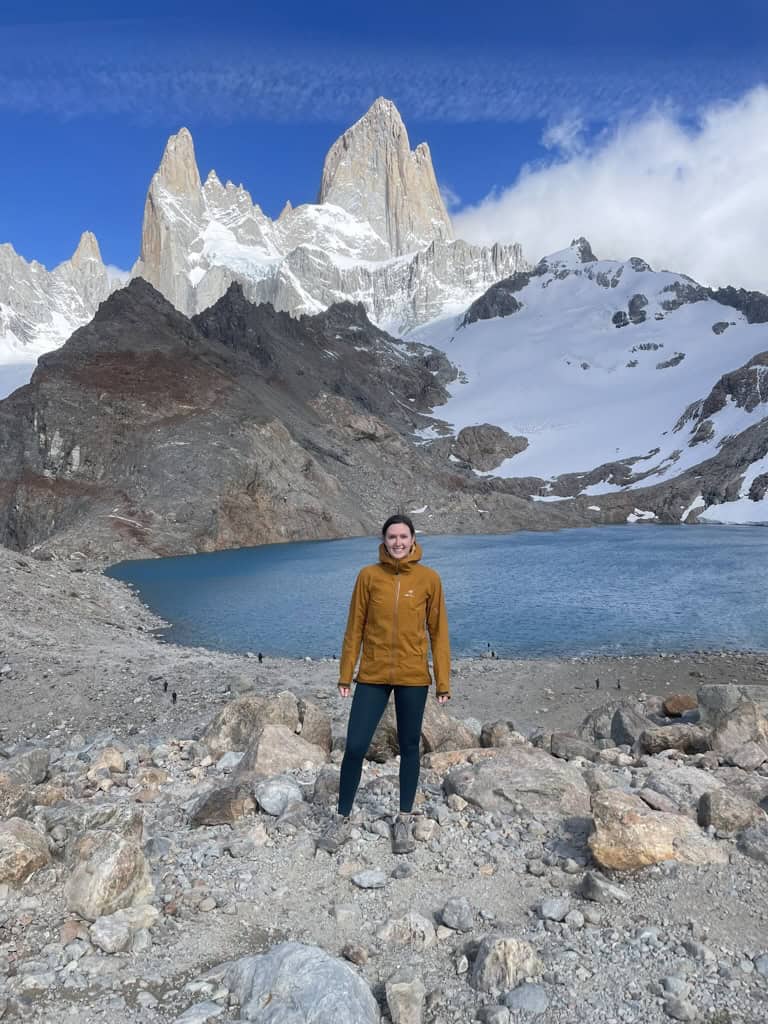
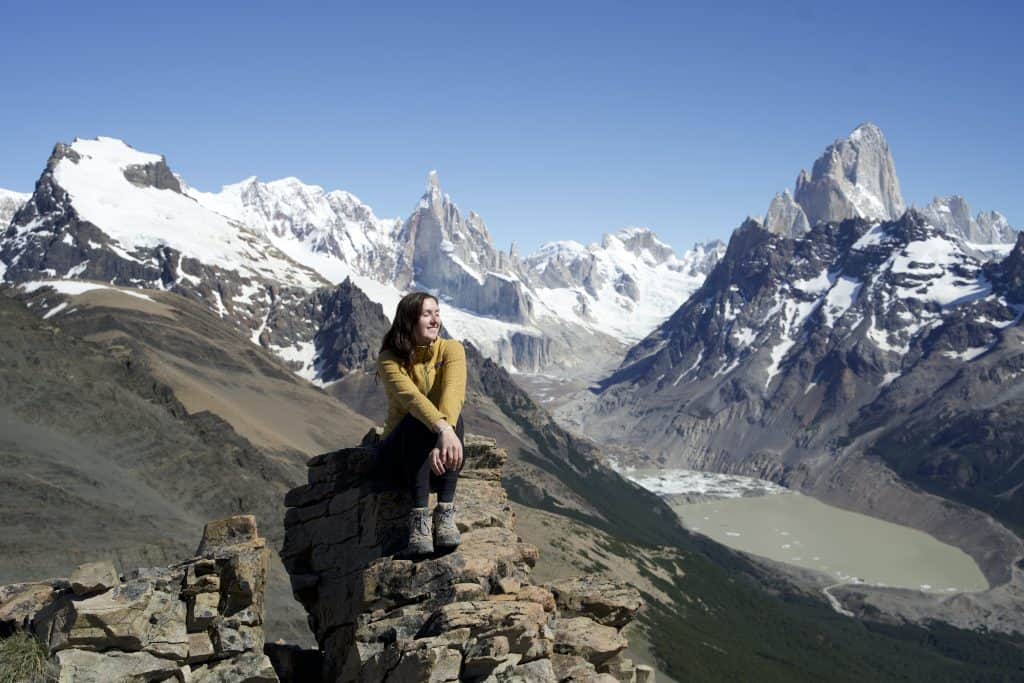
Day 9: Hike Laguna del Los Tres
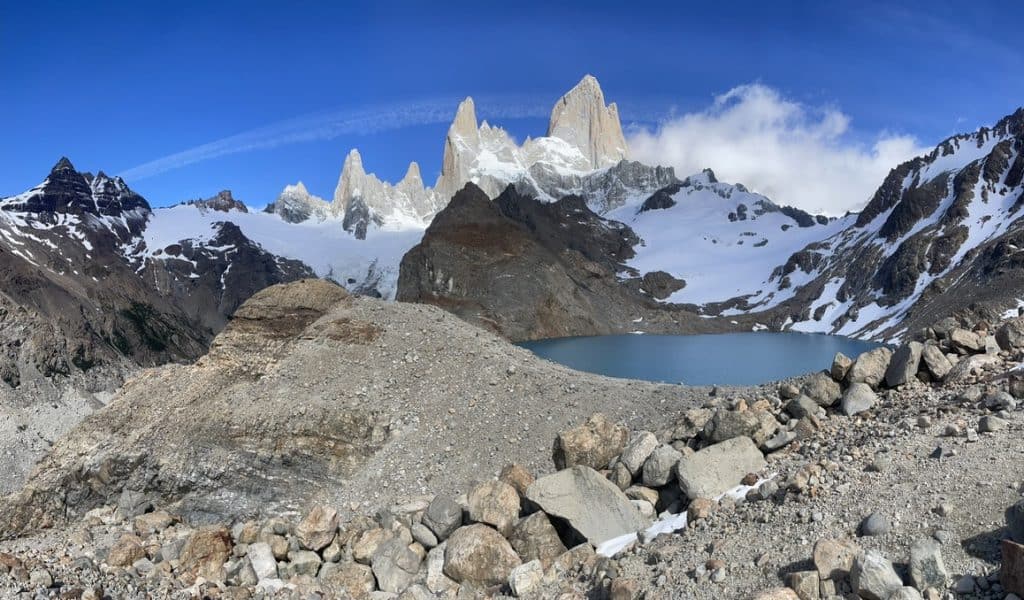
Arguably one of the most iconic hikes in El Chalten is Laguna del Los Tres (also referred to as Fitz Roy or “the Patagonia logo”). This hike was definitely the highlight of my time in El Chalten, I can confidently identify a new smile wrinkle on my face from pure joy and amazement 75% of the time hiking this trail.
The hike itself is rated medium-hard for the first 80% of the trail, however, the last hour of this hike is no joke! It’s very steep, you’re in direct sunlight and it’s a power push the whole way.
While you might be asking yourself “is this worth it?”, “why do I think this is my idea of fun”, quiet that little voice inside your head and keep pushing. You will be rewarded with the most spectacular views at the summit.
If you’re feeling extra adventurist, push on a little farther take the trail up the hill to the right for a view of both lakes!
Remember the temperature at the summit can be drastically different than in town, be sure to pack your hat, gloves and puffer coat to ensure you can spend a few hours at the top.
Day 10: Rest Day: Explore El Chalten
I’ve marked today as a rest day, chances are you legs might be a little sore from yesterday’s epic hike up Lago del Los Tres!
If resting is hard for you, here are some low impact activities you can do:
🛍️You can spend the day walking around town and looking for souvenirs
🥟 Go on a hunt for the best empanadas (My favourite were at Panadería y confitería los salteños)
🚲 Rent bikes and exploring the surrounding areas of El Chalten
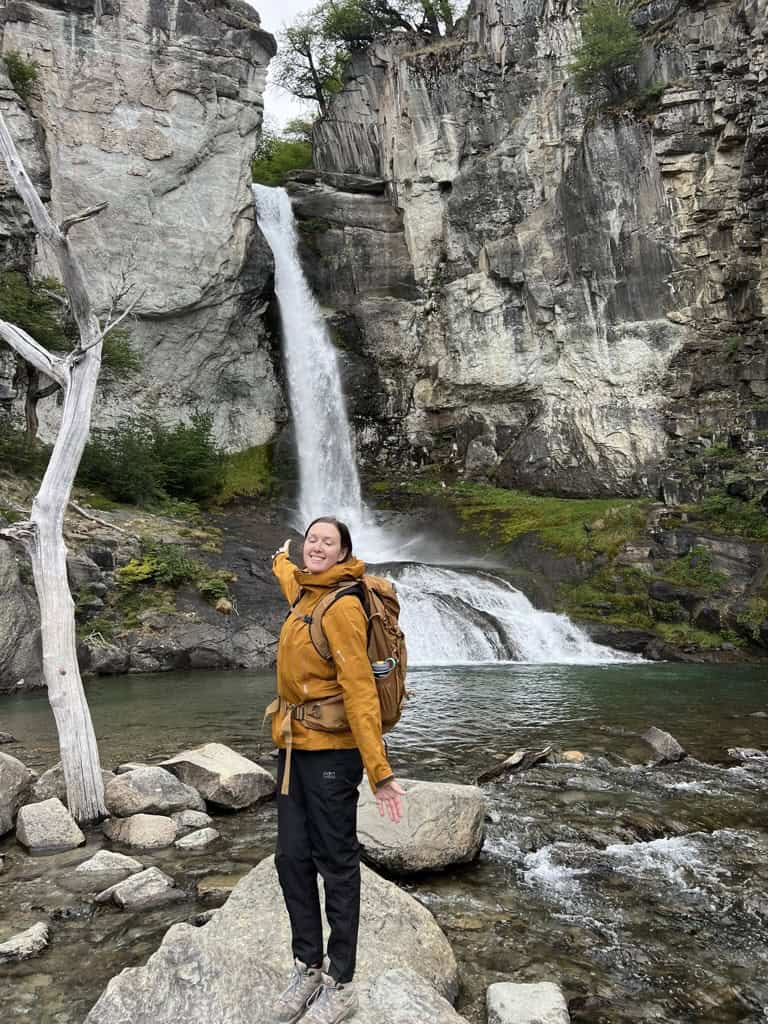
💧Head on down to one of the lakes or Chorillo del Salto for a refreshing dip under the waterfall
One thing i’ve learned about El Chalten is to trust the weather radar! If you see sunshine, it’s going to be a great day in the mountains and busy on the trails.
If you struggle to read and understand the weather in town and in the mountains, ask the receptionist for help or pop into a local guide shop in town. The people in El Chalten are super friendly and eager to help out another adventure!
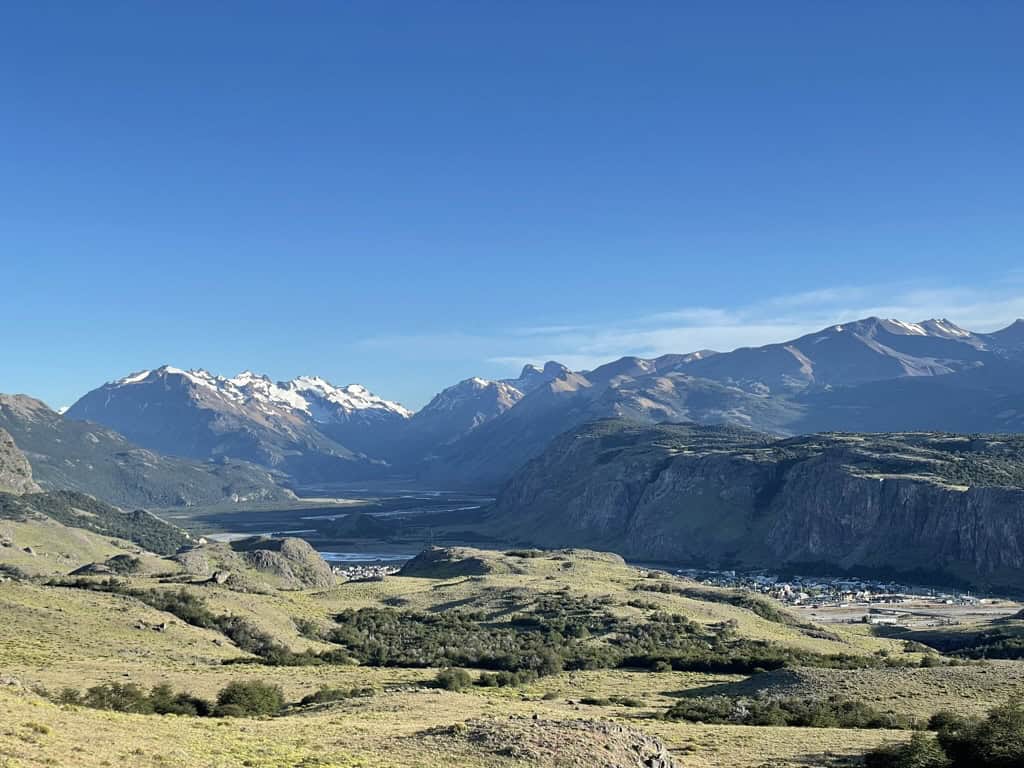
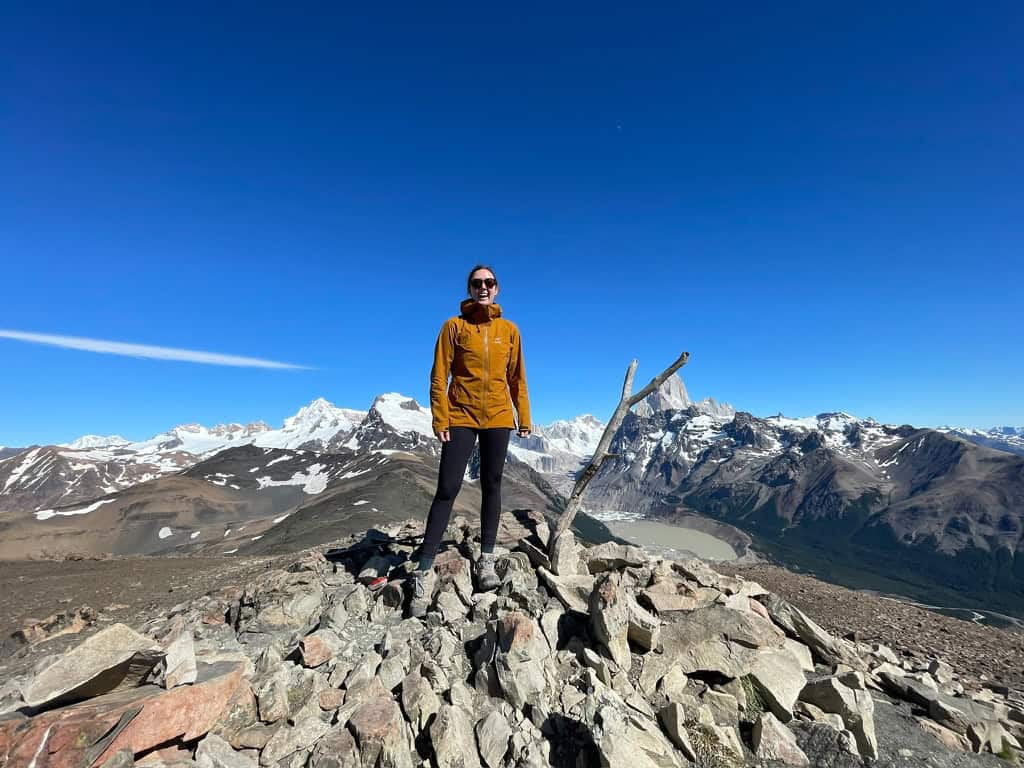
Day 11: Hike Loma Del Pliegue Tumbado
I spent 6 days in El Chalten (I extended one extra day because there was a nice weather window) and can say my two favourite hikes were Laguna del Los Tres and Loma Del Pliegue Tumbado.
A lot of people will hike Cerro Terro, however, this is why I think Loma Del Pliegue Tumbado is better. Loma Del Pliegue gives you incredible 360 views of all of El Chalten including Cerro Terro from a higher vantage point.
While Loma Del Pliegue is at a higher elevation than Laguna del Los Tres, the hike itself is very manageable through a covered forest for a majority of the hike with a gradual incline that almost unnoticeable.
Once you make it out of the forest, you’ll be rewarded with picturesque mountain meadow views.
The trick here is to hike up to the real summit for the best views! The 30 minute grind is worth it!
Day 12-13: El Calafate
Day 12: Travel to El Calafate
Your two weeks in Patagonia is coming to an end, it’s time to say goodbye to El Chalten and head onwards to El Calafate.
Good news here, you will only have a 2h 30m bus ride to El Calafate. This means if you wanted to spend more time in El Chalten, you can wake up early and hike another day then take the 3pm or 6pm bus out of El Chalten and into El Calafate.
This is what I did and would 100% recommend it, there isn’t much to do in El Calafate besides grab a nice dinner or pint.
Make sure to look back out the window when you’re leaving El Chalten, the long windy road opening up to the most glorious mountain ranges is a sight for sore eyes.
When you arrive to the bus station in El Calafate, you’ll walk through the building and out the back door. There you will see several taxi’s that will take you to your accommodation in town, the price should be around $5 USD.
Day 13: Perito Moreno Glacier
Ready for an epic adventure? Perito Moreno Glacier in Patagonia is a must-see for thrill-seekers and nature lovers alike! This massive, jaw-dropping glacier stretches over 250 square kilometers and towers 60 meters high—basically nature’s frozen skyscraper.
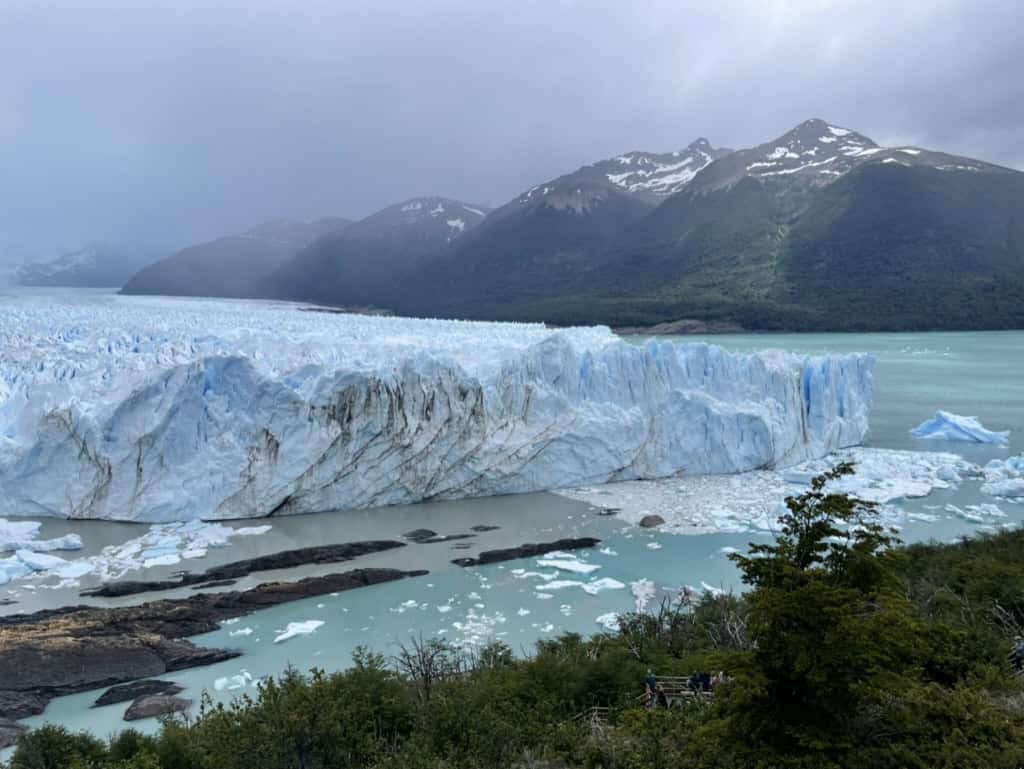
What makes it even cooler? It’s still growing, and you can witness huge chunks of ice crashing into the lake below in a spectacular display of ice calving.

There is a 45,000 ARS entrance fee for Perito Moreno National Park. Once you are in the park, there are 3 ways to view and explore the Perito Moreno Glacier depending on your budget and level of adventure:
1. Boardwalk – Free (no additional cost)
There are a series of boardwalks that take you to closer viewpoints of the glacier. Have fun exploring the different sides of the glacier, watching chunks fall off and hit the water. May if you’re lucky you’ll even see an iceberg turn over.
2. Boat – Approx. 60,000 ARS
If you want a closer vantage point of the glacier, then booking a boat tour should be on your list! The total boat trip is about an hour long and will bring you closer to the glacier and chunks of ice that have broken off. There are a few companies that you can book through.
3. Trekking on the Glacier – $600+ USD
If trekking on a glacier has been on your bucket list and you missed the opportunity at Grey Glacier, here is your second chance! You can book the “mini trekking” experience which will allow you to spend up to 5 hours exploring the glacier! There are a couple companies you can book through, i’d recommend do this well in advance to make sure you have a secure spot and can arrange any necessary transportation.
How to get to the glacier?
Getting to the glacier will depend on your party size and level of comfort.
🚌 Bus: You can take a bus booked through BusBud. This is a great option if you’re travelling solo. However, it can be a little pricey in my personal opinion.
🚕 Taxi: If you are 2+ people, I would recommend hiring a taxi. You will have the driver for the day and they will wait for you at the glacier in the parking lot until you’re finished. Our group explored the glacier for 2.5 hours and paid 120,000 ARS.
*Make sure you do not pay your taxi driver until they drop you back off at your hotel.*
🚙 Rent a Car: If you want ultimate freedom to explore on no set schedule then renting a car would be a great option for you. The roads are fairly well maintained approaching Perito Moreno National Park, but we warned they roads are very winding and steep approaching the glacier parking lot.
Day 14: Santiago
Day 14: Fly to Santiago
The last day of the 2 Weeks In Patagonia Itinerary brings you to the city that offers a rich mix of culture, history and natural beauty – Santiago! To maximize your time, i’d recommend taking the evening flight after returning from El Calafate, however, a morning flight will work as well.
Now, I am a nature girl through and through, however, when I am exploring a city I always try to book a walking tour to learn more about the history and culture. I booked a free walking tour of Santiago and the guides were super knowledgeable and share many stories on the history, culture, the mannerisms of Chilean’s from Santiago and of course some great food and drink recommendations. If you’d prefer your own guide there are plenty of options available to choose from. You have to try the Chilean Pisco Sour!
If the weather is nice I’ve heard the cable car has a spectacular view of the city. Unfortunately, the forest fires were causing too much smog so I opted to explore the Mapulemu Botanic Gardens instead which was really lovely to find some nature in the middle of the city.
Accommodations in Patagonia
There are plenty of places to stay in Patagonia, making the choice can seem daunting, however, it all depends on your wants, needs and budget. Below are some recommendations on where to stay:
Location | Where to Stay |
Puerto Natales | |
Torres Del Paine | |
El Chalten | |
El Calafate |
What to Pack for 2 Weeks in Patagonia?
2 Weeks in Patagonia can seem like a long time and almost impossible to pack for, however, here is a list of the essentials:
- Rain Jacket and Pants
- Hiking boots
- 45L Hiking Backpack
- Waterproof Bag for your clothes
- 2 Water Bottles (1L for water, 500ml for electrolytes)
- Snacks & Electrolytes
- Garmin inReach Mini
- Mini First Aid Kit
FAQ’s about Patagonia:
How expensive is Patagonia?
The cost to visit Patagonia is heavily dependent on the value of the fluctuating Argentine Peso and they area of Patagonia you are visiting, the more remote areas such as El Chalten will be pricier than smaller cities/towns. For comparison it’s not uncommon to see a loaf of bread for $10USD in El Chalten.
From my experience I would expect to pay $15-18USD for breakfast, $25 for lunch and $35-40USD for dinner at a nice restaurant.
How to Get Around Patagonia
Many people ask “do I need a car to get around Patagonia?” from my personal experience, a car is not necessary. Both Chile and Argentina had very comfortable and reliable transportation.
However, if you are traveling in a larger group and want to freedom and flexibility to be on your own schedule then renting a car would likely be more suited to your needs. Be sure to look into driving permits required in South America as well as crossing between Chile and Argentina in a rental car.
Is Patagonia better in Chile or Argentina?
The age old question, “Is Patagonia better in Chile or Argentina?” as being someone who had incredible experiences in both places, this question is almost impossible to answer.
Chilean Patagonia will capture your heart if you are seeking dramatic fjords, forests, and less crowded, off-the-beaten-path experiences. However, if you prefer easier access, iconic glaciers, wider variety of landscapes and restaurants then the Argentinian side of Patagonia will be your better choice. The good news is, both regions are spectacular, so you can’t go wrong!
Tips for Patagonia
💰Bring some emergency cash! ATMs are not easy to find and in some places they will charge you $10USD to take out a MAXIMUM of $15USD
🚍 Book buses ahead of time and take screenshots of your tickets
✈️ Book El Calafate Airport transfer at least 24+ hours in advance
🚰 Tap water is drinkable in most places
🍎 Be careful when traveling with food from Argentina into Chile, border control is very strict on what they permit into the country and you don’t want to get fined!
To Summ-it Up: 2 Weeks in Patagonia
Spending two weeks in Patagonia was always a dream of mine and as someone who has extremely high standards, this trip did not disappoint! From the ease of access to so many world-renowned national parks, epic hikes, vast and mind-blowing landscapes and picturesque mountain towns, exploring Patagonia is truly an unforgettable experience!
Buy your plane ticket, book your permits, strap on your hiking boots and get ready for an adventure that will leave you speechless!